@PaytonWP I’m in the Jacksonville, FL area. I’m also not a pro….just an amature hack who is taking up his whole garage on a fun project….LOL ![]()
Bart
EDIT: I see the communication now….duh….hat when I get confused like that on these forums ![]()
@PaytonWP I’m in the Jacksonville, FL area. I’m also not a pro….just an amature hack who is taking up his whole garage on a fun project….LOL ![]()
Bart
EDIT: I see the communication now….duh….hat when I get confused like that on these forums ![]()
Unfortunately not building anything in Birmingham. I’m sitting on a couple designs that I plan to start on when I move back down to New Orleans in the Spring.
Had chance to shape the added transom core yesterday. Measured and cut out three layers of cloth with reducing overlaps while still covering all of the core and coming over the top of the transom onto the outside (I cut that part in place while wetting in out).
Hit the core with a small batch of resin and let that tack up. About an hour later, I went forward with three layers, one after the other while wet.
Very clean work for sure, that came out great.
Agreed. Looks great!!
Awesome job!
I’ve been building parts and fitting them into place so when it is time to putty in place, I’ll have everything I need.
The original pair of stringers that I made were not up to par but paid dividends in helping me make the second pair work.
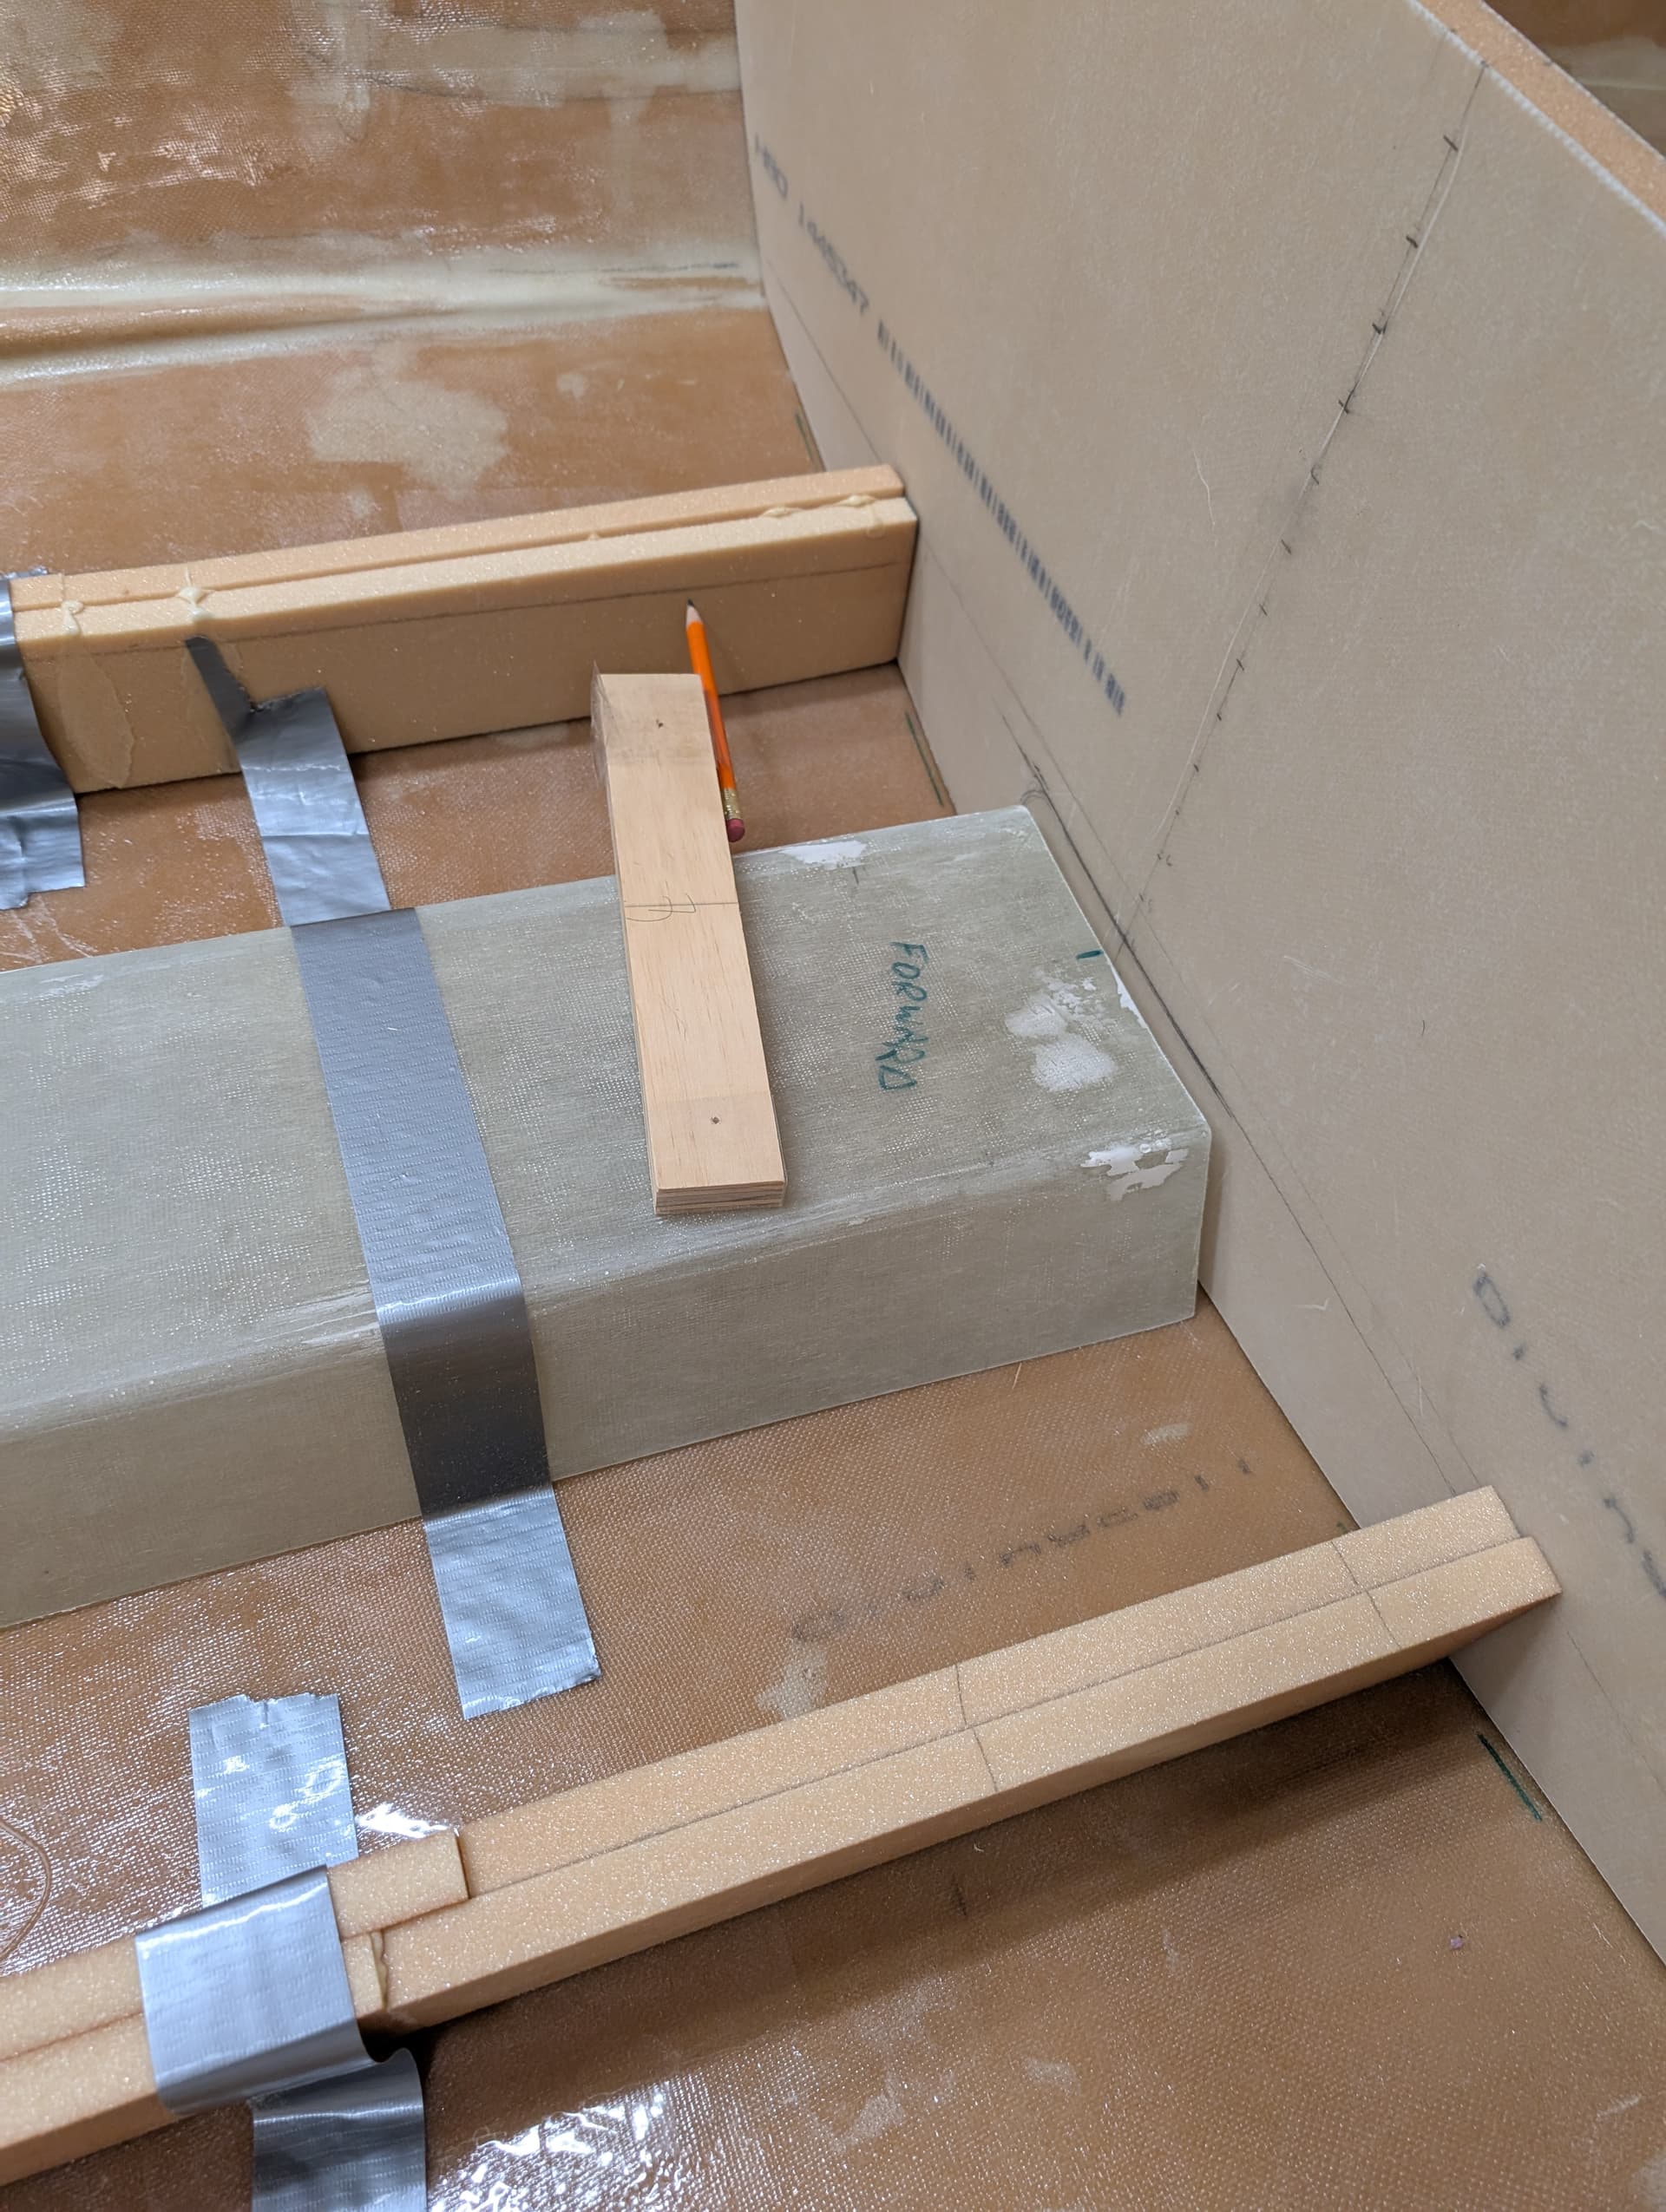
I found that the trick is to build them in sections to help with the upward slope of the hull as they move forward. I got the progressive angle on the bottom of the stringer by using stick on sandpaper (120 grit). I was going to use a laser to help find the level “top” of the stringer even with the keel box but decided on something far easier…a pencil and a strait edge and used the Keel box as the base to run the strait edge on.
I made the floor template from a single 8 foot 2x4 cut into 3/4" strips and then I used pocket screws to keep it all in the same plane.
I have to remove a little of the forward underside edge, bevel if you will, to help the floor fit but it is close enough to post…LOL
I used the pink stuff as a test cut before the real floor was cut. I had some left over basalt and used that for the top of the floor to help minimize dents from dropped stuff while fishing. The floor is still “long” as I need to trim it for the drip rail along the back. The part that I cut off will be pulled underneath and then trimmed to fit.
The splashwell is for a tiller (planned Tohatsu 30). I used 18" wide from the plans with an architectural ruler…as best I could tell. If anyone thinks that this is incorrect, let me know. (please)
I’m super stoked with how the floor is coming together…it will be even better after a little fitment. ![]()
I hope you like the update @Zika ![]()
Bart
I like!
Great job!!
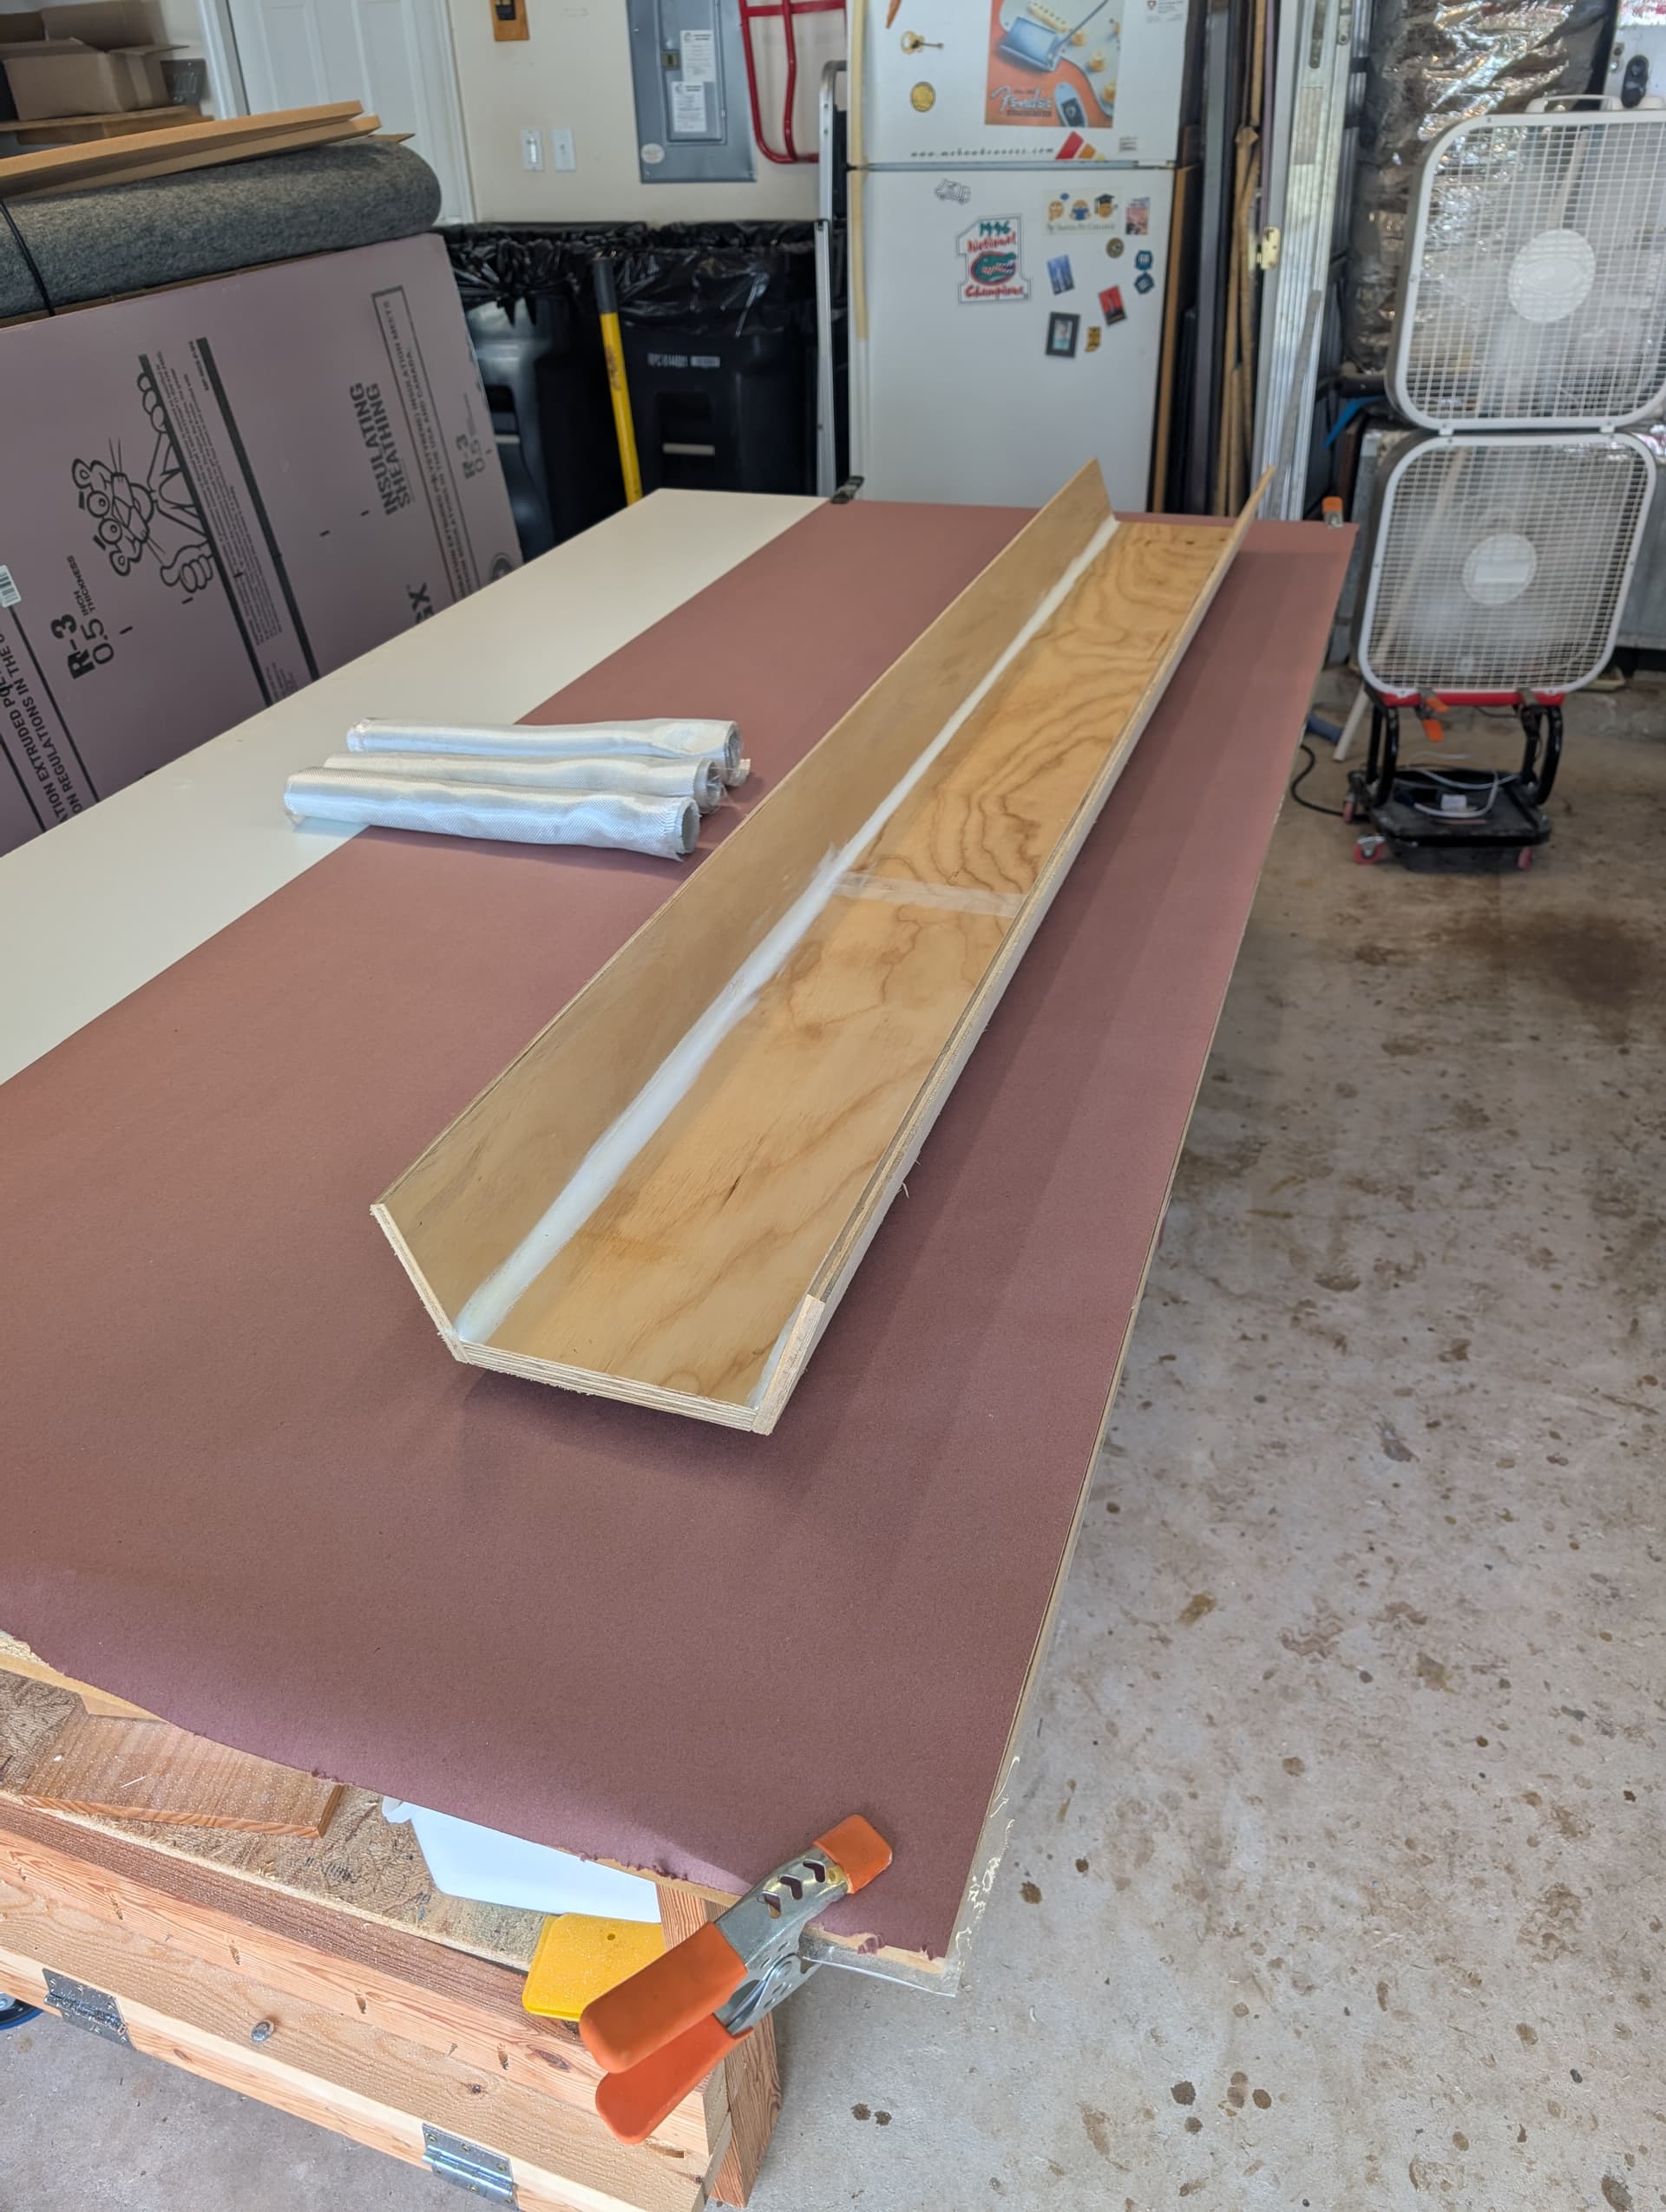
Looking back, it occurred to me that I didn’t post any pics of the female mold and build process for the keel box. Here it is. I used 20 degree angle on the table saw for the “bottom” of the top hat. I used the same angle on the sides then glued and secured with 23 gauge pneumatic nails. I used silicone to ease the edges and that almost got me to have to do it over…ha. Despite several coats of mold release, it was difficult to persuade it out of the mold. It is simply 3 layers of 10 oz. fiberglass cloth.
This will be the center floor support.
The bottom mold plywood needs to be 3/4" while the sides are 3/8". The thicker bottom makes it easier to get things lined up for the sides, which is critical.
Bart
Fit the floor today. My son and I took it out and returned it about a million times. Not only did I have to ease the edges with the belt sander to get it to totally lay flat, I had to square up the forward and aft section of the floor to make it perpendicular with the bulkheads.
I intentionally built the floor long so I could remove that section and pull it under for the drip valley at the back of the floor. The keel box and stringers have been sectioned to allow the drip rail to fit. I’ll need to probably take a little more off to allow for the cloth that will be needed to glass in the stringers and the drip channel.
Fun day with my son. Since he is married and out of the house, I really like when I can get him over to help. ![]()
Bart
What is the point of the keel box? Do you plan on using it as a chase or a drain?
@MikeCockman Great question.
This is one of the floor variations that Chris Morejohn has in the plans. The keel box is for central floor support as well as to allow for water to drain from the front locker back to the bilge should water ever get in there.
The keel box will be fully glassed to the hull and Bulkeads.
I added the stringer option per the plans for added hull stiffening without too much additional weight.
I’m really happy how the build is going. Now that the floor is fitted into place, everything is level and solid on the dry fit.
Nice. It should definitely make a strong floor/hull.
Finally got a break from work…I was able to recently putty in the forward and aft bulkheads. I re-fit the floor after I puttied in the bulkheads so its going to be “like a glove” when times comes.
I puttied in the stringers today. I plan to put fillets all the way around the bulkheads and stringers with layers of glass in the coming days.
She’s looking good, awesome work! I’ve always wanted to build a skiff, maybe in twenty years when I retire.
Looks awesome. Do you know how much the floor is going to weigh ? Do you have an educated guess on hull weight?
Sent you a Dm I’m just across the river
@Slhpoc72 Hey man…thanks for the comment. I actually was thinking about grabbing the bathroom scale yesterday…maybe 15 to 20 pounds?(I could be wrong)…three layers of fiberglass on each side and epoxy resin.
This is just one potential interior within the plans.
Bart
The keel box looks great. Thanks for showing how you formed the mold.
I took the first part of the week off from work because I’ve been doing that too much…LOL. I wasn’t going to post pics of this process today, but decided it might be good for those interested in doing something similar.
I did the fillets around the bulkheads and stringers. But before that, I cut and laid out the three layers of glass for the stringers. The first layer is always the most “difficult”, but when you put another layer on the wet, it helps tremendously to wet it out and hold it in place for the roller. To make it easier, I took the long lengths and cut into three pieces each. The rolled up sections look disorganized, but the are exactingly placed so I could just unroll them right into place. For those interested, I effectively do the stringers in three sides and not one sheet; this seems counterintuitive but its really easy to do it this way.
I also like putting the glass over the fillets when they are still soft and recently placed. It feels like it helps grab the cloth and minimizes air getting in there; I’m not certain but seems to be the case for me.
Should be a super solid hull with minimal extra weight. Such a great design! I’m really glad that I’m putting a floor in the skiff.
Instead of music in the garage this time, I played two and a half Star Wars movies…starting with the 1977 original…ha
All went down pretty easy but still tedious…took up all day.
I’m planning to tab in the bulkheads today with glass.
Bart